Frequently Asked Questions
FAQ
Which are the main technical specs of my Avitron Bionic Bird?
-Ultra light weight 8.35 g
-Very powerful motor with aluminium heat sink
-Range up to 100 yards
-WIFI connection 2.4 GHz with auto-detection
-Extremely precise power control (128 steps)
-Sharp & immediate directional control for aerial stunts
-Electronic protection against motor over heating and battery damage
-Flies up to 1 mile in a single flight
-Up to 75 charges on one set of 6 batteries
-Hybrid Lithium Polymer battery included in the bird
-Controller auto power-off (battery saving)
-Adjustable tail angle for fast or slow flights
-Up to 6 min flight , at full power, on a single charge
-Turbo charging system : 12 min
-Multi-frequency system / Auto-channel-selection (6 players at same time)
What can I do with the packaging of the product?
The suitcase packaging must be kept and used to store and carry the product in good conditions. This will increase product lifespan a lot.
Before you put the bird into the box, use the controller to adjust wing position. NEVER TRY TO MOVE WINGS MANUALLY !
Avitron looks rather fragile and delicate, how do I handle it?
This product was tested for a lifespan of hundreds of cycles in flight; however it remains a high technology product that should be handled with care when not flying. Avoid seizing it by the wings or tail, but rather by its foam body. Prevent the wings or tail to bump or grip onto another object. Never let it be stored for a long time resting on its wings, or below another object, or under direct sunlight. Place it carefully and gently on the charging gate, proceed gently also when replacing wings.
My children want to play with it alone, should I allow them to?
It is strongly recommended not to let children handle the bird, or pick it up from the ground after a flight. On the other hand, according to their aptitude, they can certainly try to control it in the air, under adult monitoring. Or simply enjoy watching Avitron flying !
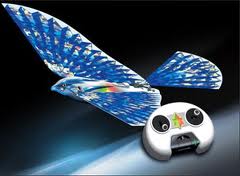
What is supplied in the box?
-Your Avitron, assembled , and ready to fly
- The controller (without batteries, requires 6 AA size)
- An extra pair of wings
- A bag of aluminium tapes to use as ballast for balancing wings (see below for details)
- An instruction manual
Which batteries should I use for the controller?
Six AA size (LR6) batteries. It should be noted that even rechargeable batteries of same size can be used, if they are of high capacity ( 2000 mAh or above). It is recommended to use at start a pack of new / identical batteries. The wear of each battery will occur at exactly the same speed, and you will need to replace them all at the same time. If you mix new and old batteries, old ones will be quickly worn, and your device won't work anymore, although several batteries are still OK.

What are the transmitter functions?

The stick on the right side is used to control the bird steering (left/right), it comes with a spring back effect.
The left side stick is the throttle stick, it allows to adjust the wings flapping speed. It has no spring back effect.
How to know when batteries are worn?
When batteries are too low, the power button will start flashing quickly.
When it happens, the last charge has probably been uncompleted too, and you can't charge it anymore.
You should replace the batteries immediately, and start charging again.
How do I charge my Avtron?
Open the charging gate on the transmitter. Turn on the power of the transmitter by pushing on the power button.

Insert AVITRON into the charging slot of the transmitter. Be careful to insert Avitron in the right direction as shown. (Figure 6).
Proceed with care so that PCB conectors are correctly inserted inside the charging slot.

The LED indicator (green light) is flashing and the star button turns off: AVTRON is charging.
When the LED indicator (green light) stops flashing and the light remains green, AVITRON is fully charged.
Then take your AVITRON off and close the charging slot. The power button will light ON. You can close the charging gate.
The total time for charging is about 12 minutes.
Should I switch the bird off prior to charging?
It is not compulsory to turn AVITRON off prior to charging. If it is synchronized to its controller already (constant LED, see below), you can go on flying immediately after the bird is fully charged, without starting up the bird again. However, the charge duration is longer in that case (16 min instead of 12 min when bird is off).
How do I switch on the controller and my Avitron?
Press the power button (star shape) on the controller, to switch it ON.
On the bird, the switch is located on its back (top of the body).
How do I synchronize my Avitron and the transmitter?
You just need to switch bird ON then controller ON. It will be done automatically. In the case of multiple simultaneous players (several birds flying at same time) there is a process to follow. The synchronized state (ready to operate) is indicated by the LEDs state. The power button should be red (resp. green) constant, the LED inside bird body should be red (resp. green) constant. The LEDs in both bird and controller must be constant and of same colour. A green and red flashing LED on the controller or bird indicate that it hasn't been synchronized yet.(see LED indicators table below).
My Avitron and controller are ON, but it doesn't work?
Check whether they are synchronized (the LEDs in both bird and controller are constant and of same colour).
If not switch both OFF, and switch ON again bird first, then controller.
Check whether bird battery is not empty (LED is fast flashing, or even OFF while switch is on ON position). Then you have to charge the bird again.
Check whether controller batteries aren't worn. If so, replace them.
My Avitron and controller are synchronized (constant LED of same colour), but the bird doesn't respond to controller orders?
At start, if the throttle stick is not in its lowest position the alert red LED will blink and you must pull it back to its lowest position to activate the transmitter (figure 7).

In which conditions can I play with my Avitron?
For the first use, in order to get familiar with the product, we recommend to try in a park, without any wind.
After you got trained to control it, then indoor use doesn't require any conditions except a room big enough to fly around without obstacle.
Outdoor use requires adapted weather conditions, ideally no wind at all (recommended for beginners, and compulsory to balance wings), and no rain.
For an experienced user, wind up to 8 mph is acceptable, if it's steady. So it's better to choose an open area, far from trees or buildings, which could create whirlwinds. Avoid flying near a road, or water, where it could fall by accident.
How to tune the tail before to launch it?

The first thing to do before to fly Avitron is to adjust the tail, manually, to choose its flying speed. The tail angle is adjustable (5 notches), making possible to adjust the drag of Avitron in the air, and thus its speed. To change the notch, just push or pull on the base of the tail.
For indoor flights, in a confined space, or for slow flights: set the tail in a high position: choose the notch n° 3, starting from the bottom, among the 5 possible positions (see figure 8). The notches 4 and 5 are not recommended for beginners.

For outdoor flights, in a big space or for fast flights: adjust the tail in a low position: using the notch 1 or 2 (See figure 9).
Knowing that: Notch 2 is recommended for beginners.Notch 1 is for best performance but requires a bit of practice, and wings adjustment (see below).Remember: When picking up the bird after landing, always check that the tail hasn't moved to another notch. If so, set it back again.
How should I launch my Avitron?
Push the throttle stick ¾ of the way up. Always point the AVITRON facing the wind, launch the bird from your hand with a gentle horizontal toss. Let it gain some altitude before trying any turns.
When I launch Avitron as described, it directly goes to the ground?
You'll need a bit of practice to learn how to launch it perfectly, to adapt to its reactions.
In a first time, if you meet that problem, you can try with the tail one notch higher. Makes also sure there is no whirlwind.
If the problem still goes on you must balance the wings
How to control my Avitron in the air?
Use the throttle stick to gain altitude fast, slowly, stabilize altitude, or fly down (gliding). Use the steering stick to turn right or left. The steering stick is very reactive, you should push it a short time to place your bird in the desired trajectory.
How can I make gliding flight?
To make Avitron glide: gain altitude, reduce speed and get the bird flying straight, then cut the throttle.
What happens if my Avitron gets too far, out of range?
If Avitron flies out of range of the transmitter, it will stop flapping and start gliding. You can walk closer to the bird and it will connect again immediately.
But, if the bird remains out of range for more than 2 min it will then turn to sleep mode, so be careful to find it back within this time limit (its much easier to locate it when it flaps wings!).
How can I do an emergency landing?
If you need to land Avitron quickly (in a risky situation), turn right or left to maximum and cut throttle, then release the direction stick. AVITRON will nosedive towards the ground. Generally, doing tight turns will cause the AVITRON to descend. It is a good way to control its flight.
WARNING: do not keep the direction stick at maximum on one side for a long time, even when the bird is not flying because it could cause the steering micro-motor to overheat.
What will happen when the bird battery becomes low during the flight?
*End of flight: When the AVITRON flight becomes less powerful it is time to recharge it. When the LiPO battery inside bird is 95% empty, the LED indicator inside the Avitron body will start flashing quickly and the power to the wings will be cut by half; then you have only 10 seconds left to land Avitron. After these 10 seconds the bird will stop flapping and you must recharge it.
My Avitron LED is flashing slowly, and it doesn't respond anymore?
Sleep mode: If you do not use Avitron for 16 min (or after 2 min out of range, or if the controller is turned off), it will automatically go into sleep mode (slow flashing light) even if the battery is not weak. You'll have to turn your Avitron off and on, and then restart the transmitter, in order to play again
When I fly my Avitron, I can feel it is not balanced; it always turns to one side?
Every Avitron is tested and balanced in the factory. However, an unbalance may subsist, and this is easy to correct by following the procedure for wing balance.
Is there a way to tweak Avitron?
Unless your Avitron is perfectly balanced as received (flying perfectly straight when the steering stick is in the middle), it is possible to tune fine the wing balance following the tutorial on balancing the wings. The general performance in flight will be improved doing so.
How to balance the wings? From the very first flight, it is essential to check the wings balance, to adjust it if needed.
To do this, it needs to fly outdoor without any wind, and set the tail in flat position (notch 1).
If while flying, you notice the following unbalanced flight:
- Immediately when launched, the bird turns to one side and goes directly to the ground (big unsteadiness).
- The direction stick is in the middle position but the bird turn left or right in small circles.
- It seems that the bird turns more easily to one side than to the other.
Then you will have to trim the wings.
A bag with small pieces of aluminium tape (ballast) is supplied with your Avitron. You must ballast opposite wings to the turning side you observed.
If the bird tends to turn to the right, add some weight to the left wing:
Take one of the aluminium tape piece and stick it near the tip of the right wing, folding over the wing structure. See figure 10.

If the bird tends to turn to the left, add the tape on the right wing same way.
Try flying the bird again, and if necessary, add another tape upon first one.
Repeat process until you get a straight flight or a slight turn to the other side than observed first.
Your Avitron is now balanced and its performance is optimized.
My Avitron was perfectly balanced, but now, it goes nose diving to the ground during the flight?
It may have happened that the wing film has detached a bit from the wing structure, and create a fold when fast flapping during the flight.
You just need to remove that fold by pulling on the wing film and then secure the gluing with a tape.
My Avitron switch is ON, but its LED is still off?
WARNING: if AVITRON doesn't light up, whatever the switch position, try to charge it. (Probably the battery protection system has been activated)
Battery protection :The electronic protection on the LI-PO battery prevents it from irreversible damage.
It operates (by cutting off the power) in the following 2 cases :
- A short-circuit
- When the battery discharges below 2.5 Volts.
This happens inevitably when you forget to switch off your Avitron, and the battery keeps on discharging slowly for hours. Then, the body LED will switch off (even though the power switch is still ON). You just need to charge Avitron again to reactivate the battery. During charge, the bird LED will start lighting again).
My Avitron is on, synchronized with controller, but wings doesn't flap anymore?
Motor protection:
If the wings get blocked by an object while the throttle is at its maximum, the over-heating protection device of the motor will cut off the power automatically.
In order to reactivate AVITRON, push the throttle back to lowest position.
After a crash landing, the tail has detached from the body. I found it aside my Avitron?
Nothing wrong about it, the tail is a part that can be removed and put back easily. Take care however to proceed gently!
It requires a good sight or glasses to do so, because assembly components are really tiny.
One wing is broken, how to replace it?
If a wing is broken, you can replace it with the spare set of wings included in the box.
Lift the tail to the maximum notch. Pinch one side of the wing, at the back of the wing where the wing is clipped to the round knob, and take it off the knob (as shown on Figure 11). Then detach the front of the wing like so hold the wing structure firmly and pull it out so that it comes out the slot (Figure 12).
It is not necessary to change both wings, when just one is broken.

Take the new wing and ensure to select the right wing for the right side of the bird and the left wing for the left side of the bird.
Start by inserting the wing structure in the slot, you should hear a "clic" which means that the wings is correctly inserted (Figure 12).
Clip the back of the wing to the round knob, underneath the tail (Figure 11).
Another part of my Avitron is broken, what can i do?
If ever the foam body or other parts were destroyed, please feel free to contact our customer's service at: support@rcbird.co.zato get replacement parts and instructions on how to replace them. Please describe precisely the defective part or the problem cause, with a picture whenever possible, so we can identify clearly which part has to be to replaced.
My friend(s) also have an Avitron, how can we fly together?
FLYING SEVERAL AVITRONS AT THE SAME TIME (auto-detection)
You can fly up to 6 AVITRONS at the same time! To achieve these simultaneous flights, you need to follow this procedure:
* Make sure that every bird and radio-controller is switched off.
* Switch on the first controller (LED light flashes red/green), then the first Avitron. Then the LEDs of controller and bird will synchronise (LED light red).
They are connected.
* Switch on the second controller (LED light flashes red/green), then the second Avitron.
Then the LEDs of controller and bird will synchronise (LED light green).
They are connected.
* Switch on the third controller (LED light flashes red/green), then the third Avitron.
Then the LEDs of controller and bird will synchronise (LED light red).
They are connected.
And repeat the same up to the sixth.
Each bird is now connected to its own controller and can be flown separately.
Note: -If, when flying AVITRONs simultaneously, any device (bird or controller) happens to switch off, repeat the above procedure (only for the bird and controller that were disconnected) to get them connected again: first turn off the bird and controller, and then turn them back on again.
If one player stops flying for a while, it's suggested he switch off his controller and his bird to prevent from unexpected connection. Generally never leave your bird or controller ON with the LED flashing (not connected) while a multi-player flight is taking place.
How does the MULTIFREQUENCY system work?
There are 6 different frequency channels, numbered from 1 to 6.
The bird and the controller need to use the same channel to be connected.
When you turn on a controller, it scans every channel from 1 to 6, in order and choose the first that is free (not used by another controller).
When you turn on a bird, it scans every channel from 1 to 6 in order. If it detects a controller free of connection (flashing LED), it will choose this channel, send a signal to this controller and the color LEDs will synchonise, from that point the controller will send a permanent signal saying that it is connected.
In any other case (when the controller is already connected or there is no controller), the bird goes to the next channel. And the process will go on until the bird finds a free controller.
If a controller and a bird are connected together and then the bird is suddenly switched off, the controller doesn't receive any signal, but it remains in the same state, on its own channel, still sending signal as if connected. No other bird will be then able to connect with this controller. So, you must re-start this controller so that it can look for a new channel and connect with a new bird.
If a controller and a bird are connected and we turn off the controller, the controller sends a signal to the bird to go into sleep mode, so that this bird cannot be controlled incidentally by another controller. You must then also in that case re-start the bird to reset.
What does each LED signal on the bird and the controller mean?

|